Image scaling of projector screens is a valuable feature that allows users to adjust the size of the projected image to fit various screen sizes, aspect ratios, or viewing requirements. Whether you need to make the image smaller to fit a smaller screen or enlarge it to fill a larger one, understanding how to properly scale the image is essential for maintaining image quality and ensuring a seamless viewing experience.
Most projectors offer built - in image scaling capabilities that can be accessed through the projector's on - screen menu. One of the common scaling options is aspect ratio adjustment. As mentioned earlier, different content may have different aspect ratios, such as 4:3, 16:9, or 2.35:1. If the aspect ratio of the content doesn't match the screen's native aspect ratio, the image may appear stretched, squashed, or have black bars on the sides. To address this, users can select the appropriate aspect ratio setting in the projector menu. For example, if you're projecting a 4:3 image onto a 16:9 screen and want to fill the entire width, you can choose the "stretch" or "zoom" option, although this may distort the image vertically. Alternatively, you can select the "letterbox" or "pillarbox" option to maintain the correct aspect ratio and avoid distortion, but this will result in black bars on the top/bottom or sides of the screen.
Another important aspect of image scaling is the zoom function. The zoom feature allows users to increase or decrease the size of the projected image without physically moving the projector. By adjusting the zoom setting, you can make the image larger to fill a larger screen or smaller to fit a more compact space. However, it's important to note that excessive zooming can lead to a loss of image quality, as the projector has to stretch the pixels to cover a larger area. Therefore, it's advisable to use the zoom function within a reasonable range and consider other factors, such as the projector's native resolution and the viewing distance, to ensure a sharp and clear image.
Some projectors also offer advanced image scaling features, such as digital keystone correction. Keystone correction is used to adjust the trapezoidal distortion that occurs when the projector is not perfectly perpendicular to the screen. By using keystone correction, you can scale and reshape the image to make it rectangular and properly aligned on the screen. This is particularly useful in situations where the projector cannot be placed in an ideal position. When scaling the image, it's important to preview the changes on the screen and make incremental adjustments to achieve the best results. Regularly checking the image quality and ensuring that the scaling settings don't compromise the sharpness, color accuracy, and overall integrity of the projected content is crucial for a satisfying viewing experience.
Read recommendations:
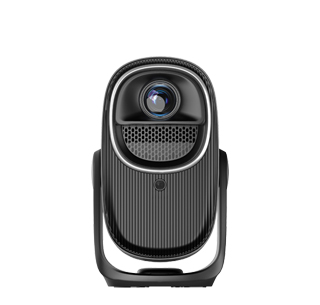
HW30 Home Cinema - HW Series Projector
How Many Lumens Are Ideal for a Projector
Connecting a Computer to a Conference Room Large - Screen Display


 Reviewed: