Easy installation methods for projectors focus on minimizing complexity, eliminating the need for professional tools or technical expertise, and allowing users to set up the device in minutes. The core of these methods is leveraging the projector’s built-in intelligent features and simple placement options, ensuring that even first-time users can achieve a clear,方正 image with minimal effort. The most straightforward installation method is the “plug-and-play” tabletop setup, which requires no permanent modifications to the space and is ideal for most home and small office scenarios.
To complete a plug-and-play tabletop installation, follow these simple steps: First, choose a stable, level surface (such as a desk or coffee table) and place the projector on it, ensuring the lens is facing the projection surface (screen or white wall). Next, connect the projector to a power source using the included power cable and turn it on. Most modern projectors will automatically trigger intelligent calibration features, such as automatic focus and automatic keystone correction, which take 3 to 5 seconds to adjust the image to be clear 。 If the projector does not have automatic calibration, manual adjustments can be made using the built-in controls—focus the lens by rotating the focus ring until the image is sharp, and use the keystone correction buttons to adjust the image’s shape until it is rectangular.
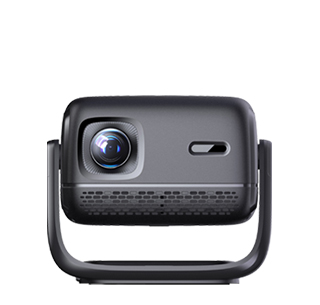
For users who want a more permanent but still easy installation, a portable projector stand is a great option. These stands are lightweight, adjustable, and require no assembly tools—simply unfold the stand, adjust the height to align with the projection surface, and place the projector on top. This method offers more flexibility than a fixed tabletop and avoids the need for drilling or mounting. Another easy installation method is wall-mounted placement using adhesive mounting brackets, which are designed for lightweight projectors and can be attached to the wall without drilling. These brackets are easy to install and remove, making them suitable for renters.
After positioning the projector, connect it to your desired content source. For wireless connectivity, ensure the projector and your device (phone, laptop, tablet) are on the same Wi-Fi network, then use the projector’s screen mirroring feature to connect. For wired connectivity, use an HDMI cable to connect the projector to a laptop, Blu-ray player, or gaming console—most projectors have multiple HDMI ports for easy connection. Once connected, you can start playing content immediately. With these easy installation methods, setting up a projector becomes a quick and hassle-free process, allowing users to enjoy large-screen viewing without the stress of complex setup.
Read recommendations:
HW45 Home Cinema - HW Series Projector
Easy to Clean and Maintain Projector
Can Projectors Connect to WiFi


 Reviewed: